[section label=1. Introduction]
Mid-Range Price, High End Features
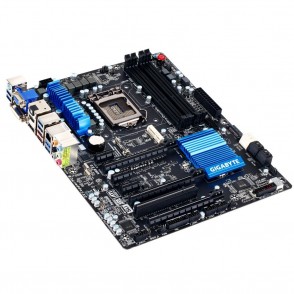 Only introduced a couple of months ago, Z77 boards have become all the hype these days. Sporting all the features of the Z68 chipset and a bit more, the Z77 chipset is looking to kick things up a notch with native USB3.0 support (up to 4) , Rapid Start for faster boot times, Smart Connect to keep web pages refreshed while your computer sleeps, and more. Of course, for many of these features such as native USB 3.0 support, an Ivy Bridge processor is required; however, Z77 motherboards will have full support for any LGA 1155 CPU, so both Ivy Bridge and Sandy Bridge processors will apply.
Today we’ll be doing reviewing Gigabyte’s new Z77X-UD3H motherboard. This mid-range Z77 (Panther Point) based motherboard has all the new features included with the Z77 chipset as well as a couple new Gigabyte specific features thrown in as well such as 3D Power, 3D BIOS, and Ultra Durable 4 which Gigabyte claims will provide high temperature protection, humidity protection, electrostatic protection, and power failure protection. Additionally included is Lucid’s new Virtu’sMVP technology, which combines the horsepower of the on-board GPU with the discrete GPU to provide better performance.
Specifications
| CPU |
(Some Intel® Core™ processors require a graphic card, please refer “CPU support List” for more information.) |
|---|---|
| Chipset |
|
| Memory |
(Please refer “Memory Support List” for more information.) |
| Onboard Graphics | Chipset:
|
| Audio |
|
| LAN |
|
| Expansion Slots |
|
| Multi-Graphics Technology |
|
| Storage Interface | Chipset:
Marvell 88SE9172 chip:
|
| USB | Chipset:
VIA VL800 chip:
|
| Internal I/O Connectors |
|
| Back Panel Connectors |
|
| I/O Controller |
|
| H/W Monitoring |
|
| BIOS |
|
| Unique Features |
|
| Bundle Software |
|
| Operating System |
|
| Form Factor |
|
[section label=2. Features]
Gigabyte Z77X-UD3H Features
Starting off with the construction. Gigabyte implemented their full range of Ultra Durable 4 technology on to this board. For those of you who are not familiar, Ultra Durable 4 includes a whole list of features such as the new glass fabric PCB2X Copper PCB, Dual BIOS, all Japanese Solid Caps, High Resistance ICs, and Lower RDS(on) MOSFET to keep your motherboard safe from the most common hazards. (As mentioned earlier, high temperature, humidity, electrostatic, and power failure)
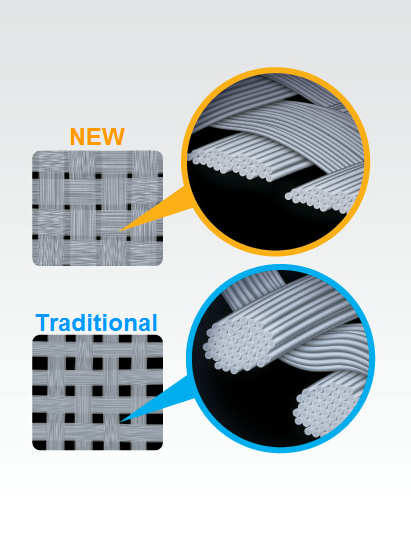
Among the components of Ultra Durable 4 is the new glass fabric PCB included on the Z77X-UD3H. Instead of having a cylindrical structure, this new type of glass fabric sports a flatter shape.This helps reduce the gaps between each weave for added protection against moisture. As an added bonus, the PCB looks extremely good as the typically brown colored copper layer in the PCB is better hidden.
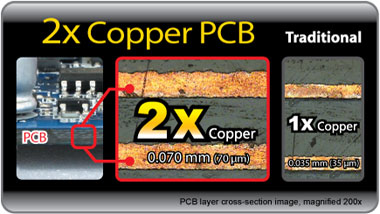
Along with the new glass fabric PCB, the power and ground copper layers in the Z77-UD3H’s PCB are doubled in thickness as well and measures in at 70 µm, which is twice as thick as the ones found in traditional motherboards (35µm). Gigabyte claims that the extra thick copper layers increase signal strength by lowering overall board impedance, offers extra protection against EMI (Electromagnetic Interference), and decreases heat output as there’s more copper to conduct heat. All of these translates to improved system stability and higher overclocking potential.
The board also features all solid Japanese capacitors which both lasts longer and outputs less heat. One added bonus is that in event of failure, they shouldn’t explode either, which is a problem with cheap capacitors. To further reduce the temperature and increase the motherboard’s lifespan, Gigabyte has included lower RDS(on) MOSFETs that outputs lower heat than traditional MOSFET designs. The high resistance ICs and anti-surge ICs can tolerate more ESD and higher surges than traditional ICs.
Gigabyte has also gone with dual physical BIOS chips, which up to this point are a rare sight with previous generation boards. That said, with recent Z77 motherboards across all manufacturers, this feature is becoming increasingly common even for mid-range motherboards such as the UD3H. Having two physical BIOS chips greatly enhances the board’s reliability and flexibility. The user can either set the second BIOS chip as a backup for the first, or have a completely different profile stored in there for convenient switching. Speaking of convenient switching, Gigabyte included a BIOS switch right on the board; so all the user has to do is to flick the switch and boot. This is great for enthusiast overclockers looking to tinker around with some more experimental BIOS settings. No longer will all your hard work in finding a stable overclock go to waste when you decide to “experiment” a bit more. Additionally, Gigabyte has also finally moved away from their “hybrid” EFI BIOS, which is more of a traditional BIOS into UEFI, which we’ll cover a bit later in the review.
In the overclocking department, Gigabyte hasn’t skimped out either as they’ve armed the Z77X-UD3H with a complete array of overclocking features. The onboard power/reset button is a huge help to those who have their system on a test bench and the voltage read points deliver more accurate voltage readings than the system BIOS. In case more power is required for two or three way SLI/CrossFire configurations, the board has an additional SATA power connectors to deliver the extra juice when it’s needed. Finally, to help you salvage the situation when things go haywire, Gigabyte also included a clear CMOS button and a POST LED for debugging. It’s actually quite staggering how many improvements Gigabyte has made with the Z77 boards over their older generation boards. I approve.
[section label=3. A Closer Look]
A Closer Look at the Gigabyte Z77X-UD3H
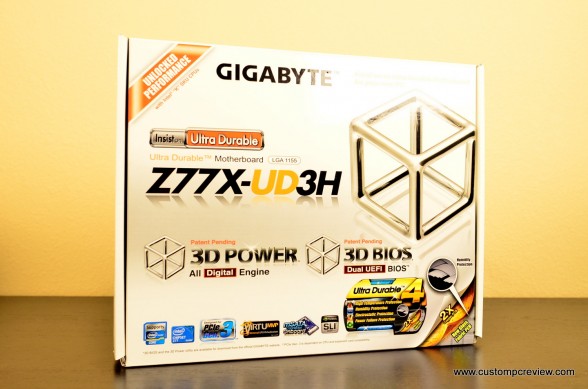
Here’s a look at the Gigabyte Z77X-UD3H packaging, which includes logos to some of the features included on the motherboard.
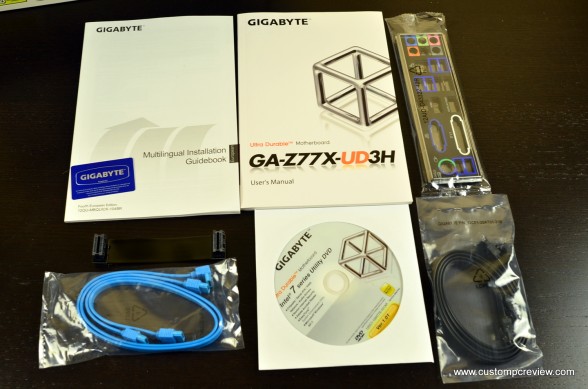
Besides the motherboard itself, the Z77X-UD3H comes with an installation guidebook, a users manual, an I/O shield, a driver CD, 2x SATA 6 connectors (1x straight and 1x right-angled), 2x SATA 3 connectors (1x straight and 1x right-angled), and a SLI bridge.
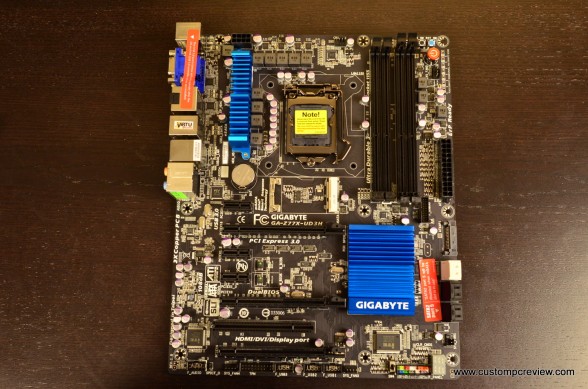
The motherboard is in the traditional ATX layout. Gigabyte’s decision to use black PCB with this board certainly paid off–the board looks absolutely stunning! The feel of the board is unlike many other boards as well. This one has a very matte feel to it which feel much more slip resistant. Not that it matters, but it’s nice to note anyway.
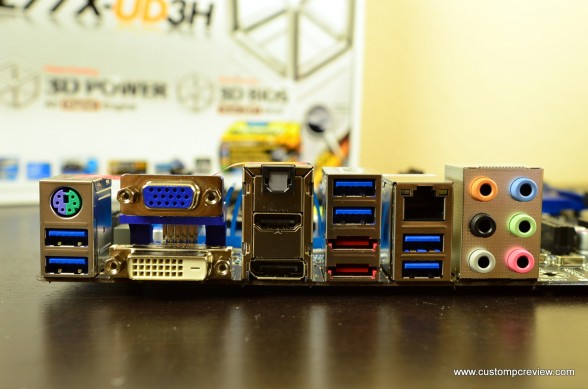
The back panel has 6x USB ports (two controlled by the Intel chipset and four controlled by the VIA VL800 Controller), 1x combo mouse/keyboard PS/2 connector, 1x DVI out, 1x VGA out, 1x HDMI out,1 x Optical S/PDIF out connector, 1 x Optical S/PDIF out connector, 1x Display Port, 2x eSATA connectors, 1x Atheros RJ45 LAN port, and 6 audio connectors. Do note that the four VIA controlled USB 3.0 ports require a driver to be installed in order to work.
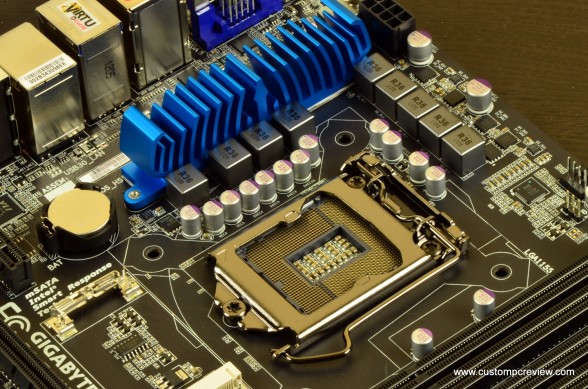
Here we have a shot of the LGA 1155 socket that supports both the 32nm Sandy Bridge processors as well as the new 22nm Ivy bridge processors. The board has 6 (Vcore) + 2 (VSA) + 1 (VTT) voltage regulators. As a part of Gigabyte’s Ultra Durable 4, all chokes on the board are ferrite core and all capacitors are high quality Japanese solid capacitors rated for 50,000 hours. The CMOS battery is also located very close to the heatsink mount area. Although this is unusual, it should not pose any problems for users who have large CPU coolers.
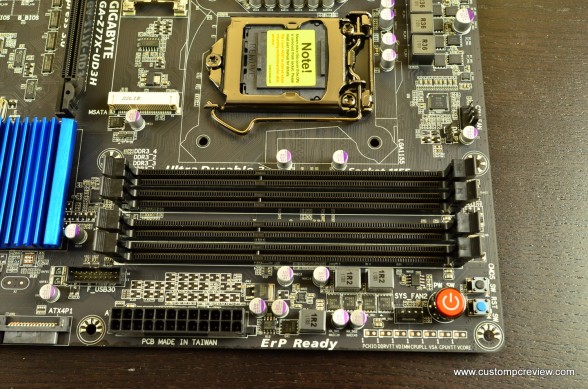
The UD3H has four memory slots which can accommodate up to 32GB of RAM (4x 8GB). As usual, Gigabyte separated the four memory modules into two groups of two, but for some reason the pairs are not color coded. For best performance, always use alternating slots. In the top-right corner of the picture is the on board power button (orange), the clear CMOS button (blue), and the reset switch(black). Directly beneath the CPU socket is a mSATA slot incase the user wants to install a mSATA SSD. This mSATA SSD can be used as a cache or as a small standalone drive.
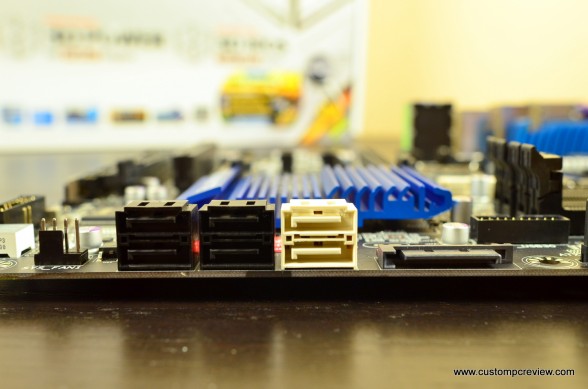
The UD3H has 2 SATA 3 6Gb/s ports (white) and 4x SATA 2 3Gb/s ports (black). To the right of the SATA ports is an auxiliary SATA power connector to deliver extra power to the board. This is especially good for those who run SLI/CrossFire setups as it allows extra power to be delivered to the PCIe slots.
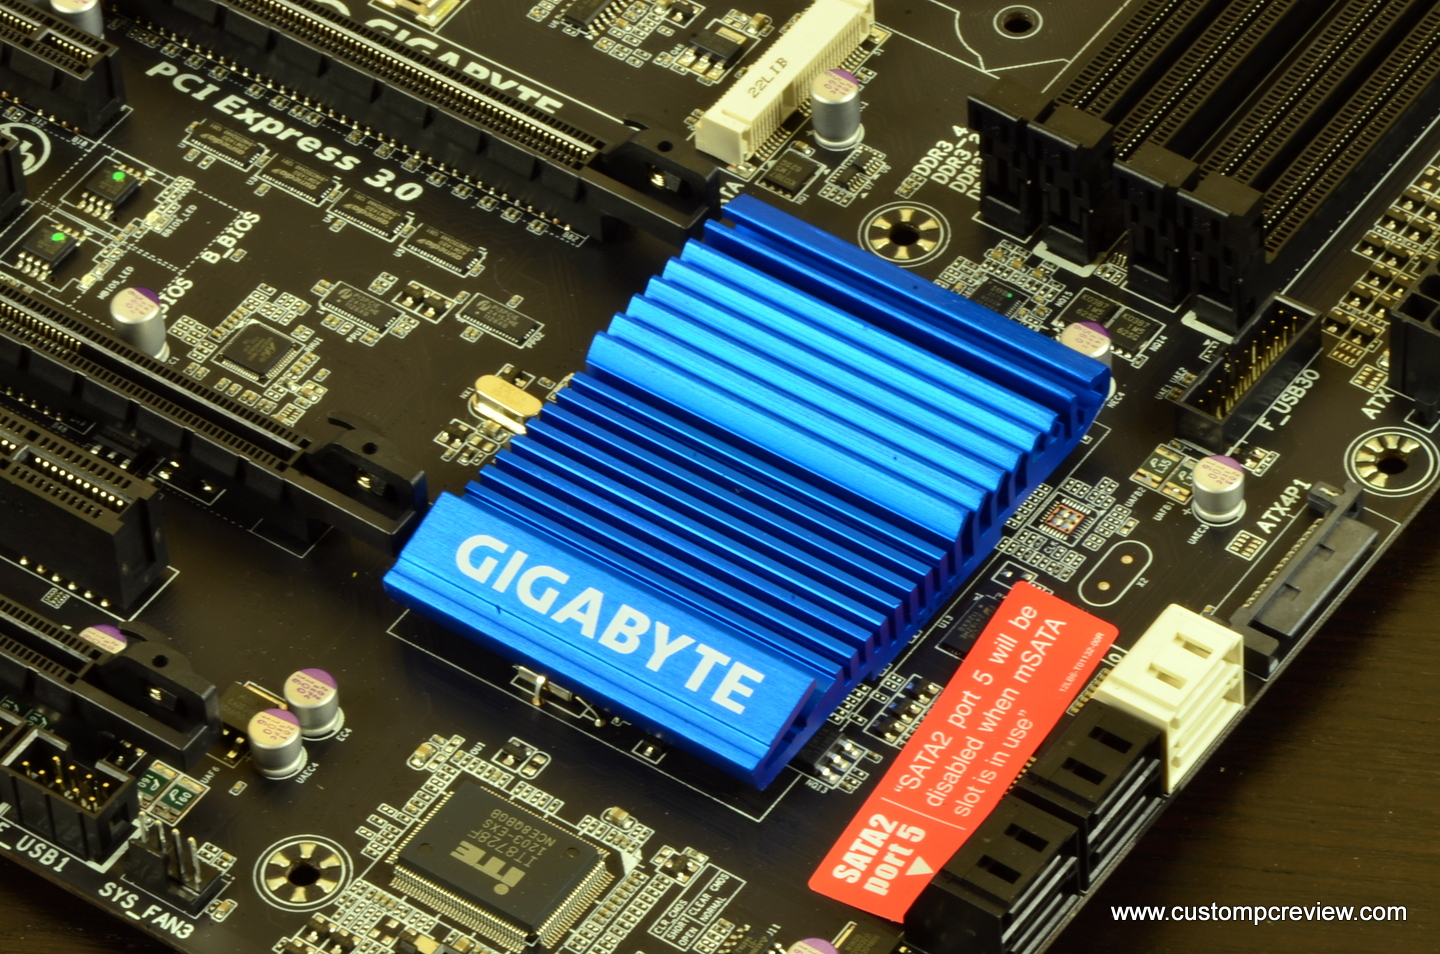
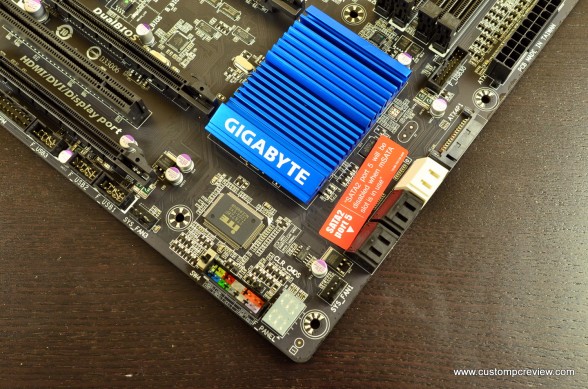
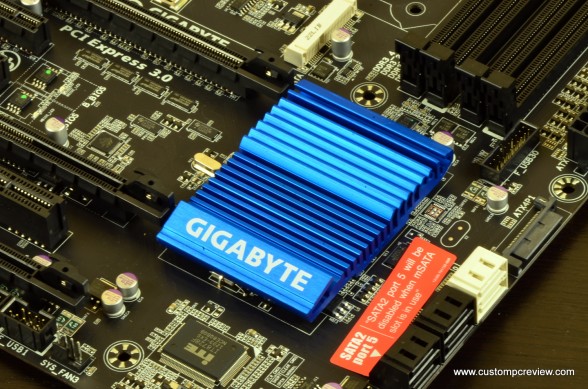
The bottom right corner of the motherboards is home to the chipset and its heatsink. Right beneath the chipset heatsink is the ITE IT8728F Super I/O chip. Below the super I/O chip we have the BIOS switch for switching between the dual BIOS chips. To its immediate right is the case front panel connectors as well as the POST debug LED.
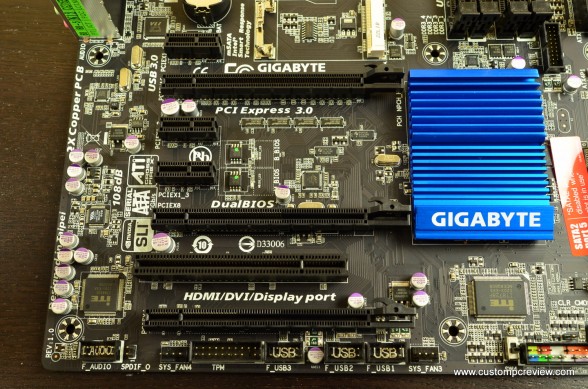
The board features 3x PCIe 3.o x16 slots, 3 PCIe 1x slots, and 1x PCI slot. There’s plenty of space between the PCIe x16 slots so double or even triple slot graphics cards in SLI/CrossFire should not be a problem. The first PCIe 3.o x16 slot runs at 16x, the second one runs at 8x, and the third runs at 4x. Additionally at the bottom, there are 3x USB headers, an audio header, two fan headers (1x 3 pin and 1x 4 pin) all clearly labeled to avoid confusion. Between the PCIe x16 slots, there’s also two BIOS chips (switchable), which is an excellent addition for over clockers.
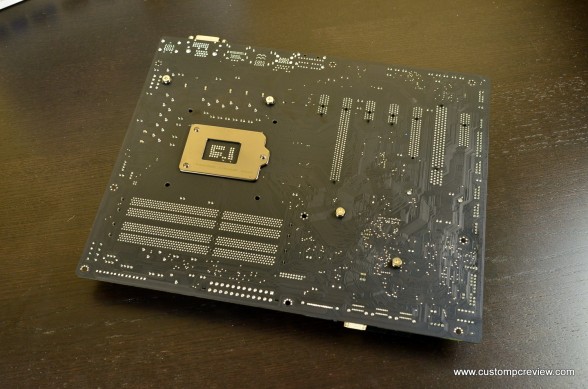
The backside of the motherboard is very clean. The PCB of the motherboard is very different from the ones we’ve tested so far. The surface feels very smooth and it’s very difficult to see the copper layer through the surface, which is what causes many motherboards with “black” PCBs actually look brown. This is because Gigabyte is using a new type of glass fiber that leaves smaller gaps between each weave. Gigabyte claims that this new fiber adds durability and increases the board’s resistant to moisture.
[section label=4. Software]
Software
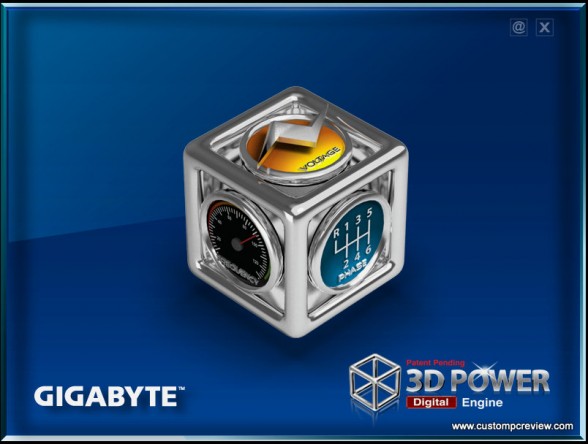
The Z77X-UD3H employs Gigabyte’s brand new 3D Digital Power Engine to give it an extra edge in overclocking when compared to boards from other manufacturers. Compared to analogue power, digital power is much cleaner and easier to control. Combined with PWM and filtering, the output voltage is much more precise. This in turn increases power efficiency and more precise power delivery to the CPU, CPU graphics, memory, and VTT. Not only does digital power enhance power efficiency, it also reduces EMI which further increases the lifespan of the motherboard.
As you can see here, the Gigabyte 3D Power software will allow users to adjust power delivery options for the voltage, phase, and frequency controls.
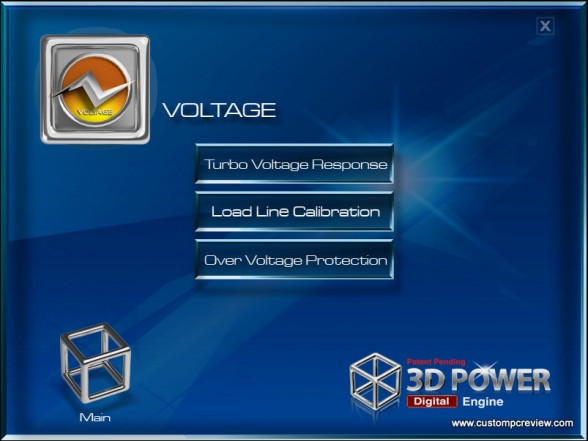
In the voltage control section, users will be able to change voltage parameters. By using Load Line Calibration, Vdroop can be eliminated so even if the user increases the current, the system will still be able to maintain an optimal voltage level. Over voltage protection options can be enabled here as well.
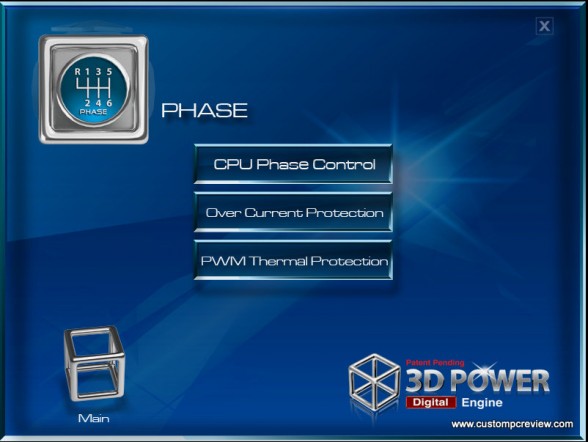
In the phase control section, CPU phase control, over current protection and PWM Thermal Protection setting can be adjusted to further accommodate overclocks.
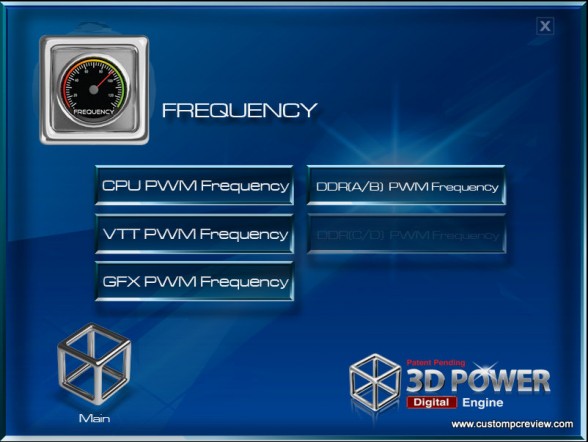
The 3D Power Frequency setting allows the user to adjust the PWM controller frequencies to allow the VRM to adjust the voltage delivery faster and more efficiently.
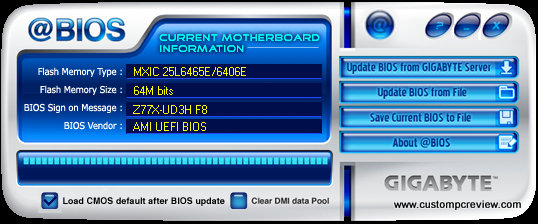
The @BIOS utility allows the user to update the BIOS in Windows. The nice thing about @BIOS is that updated BIOSes can be downloaded direct from Gigabyte’s server. This is extremely handy if you don’t want to mess around with an external storage device. It also displays information on the current version of BIOS installed on the motherboard.
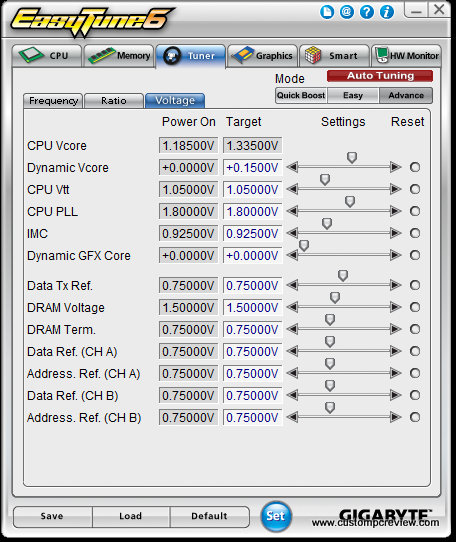
The EasyTune 6 utility is incredibly full featured and is easy to use. As you can see above, between EasyTune 6 and 3D Power, fine tuning of almost any setting enthusiast could ever need or want may be adjusted. Here we have a shot of all adjustable settings for the CPU voltages. Additionally, CPU information, memory information, system information, fan control, and one step overclocking may be adjusted in Easy Tune 6 as well.
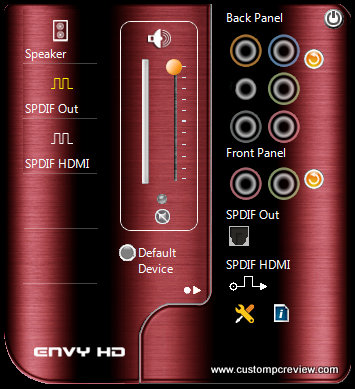
Included is also the Via Envy HD audio utility. Nothing too special here. Just simple onboard audio.
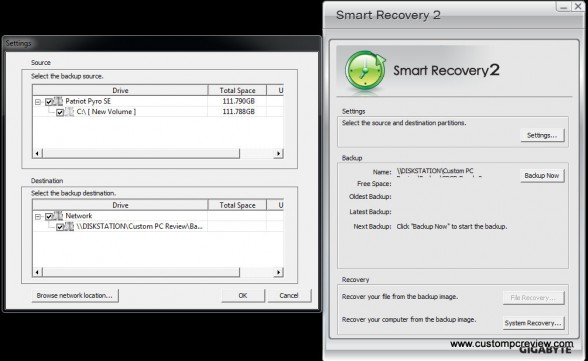
One pretty cool utility Gigabyte has included with the Z77X-UD3H is the Smart Recovery 2 back up utility which allows you to backup your hard drive so you save all your data when it fails. As shown here, the utility allows for backing up to a network drive such as one off a NAS unit.
As a bonus, we also tested out the Lucid Virtu MVP software. For those who are cringing in confusion, the Lucid Virtu MVP technology has the ability to use the onboard CPU graphics in conjunction with the discrete GPU to boost performance. Contrary to the advertised claims however, we did not see a significant jump in performance when this feature was enabled. Of course, we didn’t do a ton of testing here as it’s not a review of Virtu MVP, but we did run our Crysis 2 benchmark with Virtu MVP enabled and actually saw a 0.4 FPS decrease in frame rate. This is within the margin of error, but it’s only a single game, so nothing definitive can be said about this feature at this time. That said, we’ll definitely be doing something a bit more in depth on Virtu MVP in the future.
[section label=5. UEFI and Overclocking]
UEFI and Overclocking
Overclocking on the Gigabyte Z77X-UD3H was very simple. Like many other motherboards on the market, there are essentially two options when it comes to overclocking.
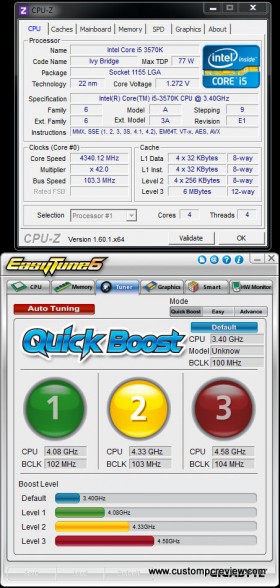
The first is one step (automated) overclocking, which on the Gigabyte motherboard can be achieved using the Easy Tune 6 utility. All that’s required is simply selecting option 1, 2, or 3. Unfortunately, option 3 (4.58GHz) ended up being unstable during stress testing, so I ended up reverting back to option 2 (4.33GHz), which worked flawlessly. Automated overclocking however, does overcompensate a bit on the voltage and increases the base clock in order to achieve this, which isn’t recommended.
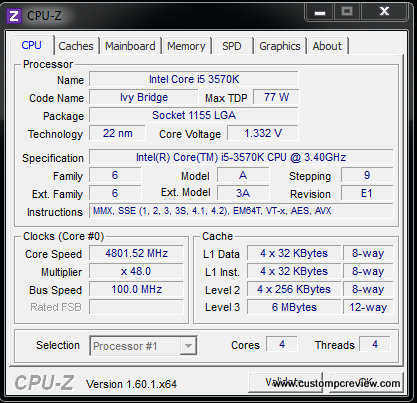
The other of course is through manual overclocking. The above CPU-Z screenshot is an example of what I was able to achieve through a little bit of manual tweaking. I simply set the voltage at 1.35v and the multiplier at 48. Unfortunately with Ivy Bridge processors, overclocking is more severely limited by its heat output than anything else. Although our chip ran 100% stable at 4.8GHz, it was running at around 90°c – a bit too high for my tastes.
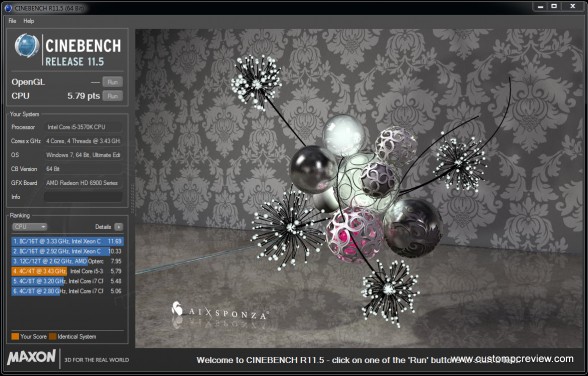
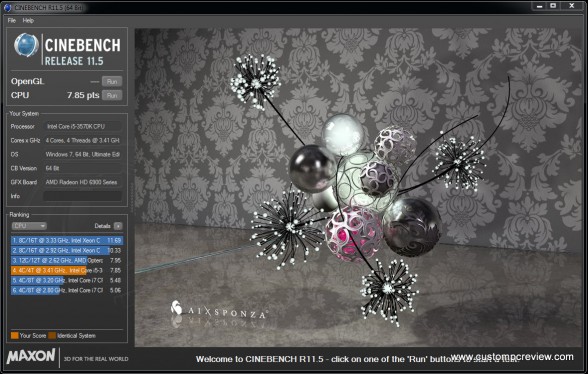
Once the CPU is overclocked to 4.8GHz, it gained a 2.06 point performance gain (+35.6%) in the extremely CPU intensive Cinebench benchmark.
[section label=6. Conclusion]
Gigabyte Z77X-UD3H Conclusions
From what we’ve seen today, it’s pretty clear that Gigabyte’s Z77X-UD3H is a big improvement from what we’ve seen from older generation boards. A couple of months ago, Gigabyte was the underdog in the move towards UEFI. While major motherboard manufactures like ASUS, ASRock and MSI were rushing to cram their first iterations of UEFI into their P67/Z68 boards, Gigabyte insisted on their “hybrid” EFI BIOS, which felt like a fancy name for the old BIOS. That said, it looks like Gigabyte has spent the last couple months perfecting their UEFI as the UEFI implementation on the Z77X-UD3H is among the best we’ve seen. One innovative feature Gigabyte has included with their UEFI is what they call “3D BIOS”, which is a 3D interactive diagram sporting both a graphical representation and a description of each motherboard component the user is about to tweak. While this 3D BIOS still feels a bit gimmicky for me at the moment, it does seem like an innovative feature that could go far in future releases especially for novice computer builders. Old school computer builders still have access to the full list of UEFI settings to accommodate their needs as well, so don’t worry too much about the 3D BIOS screwing everything up.
Appearance wise, Gigabyte’s decision to use black PCB really made its looks stand out among boards of the same category. Construction quality is top-notch as well with the board featuring high quality solid Japanese capacitors, excellent soldering, and a high quality PCB. Speaking of its high-grade PCB, it seems like Gigabyte’s new glass fabric also helps the black coloration of the PCB become more saturated and the surface feel much smoother than boards we’ve seen from the past. So, in short we’re getting a motherboard that not only looks better, but also contains enhanced resistance to moisture and increased overall reliability.
Of course, appearance doesn’t mean anything if the board doesn’t carry the appropriate features to go along with it, and it’s definitely not short in that department either. Tons of features have been inserted for easy overclocking such as the dual BIOS feature which proved to be extremely useful for pushing those higher overclocks without having to wipe a previously stable overclocked BIOS. Speaking of overclocking, onboard power/reset were extremely useful as well especially for running the system on a test bench. Having voltage check points right on the motherboard is also quite useful as voltages could be easily checked on the fly. That said, from our testing, the motherboard’s power delivery systems were spot on with deviations between actual measured voltages and reported voltages well within ±0.01v. Other neat onboard features include the internal mSATA port, which is a feature we don’t really see too often from other motherboard manufacturers, a SATA power delivery port, and a USB charger port which will allow charging of USB devices even with the system powered off.
The software package included with the board was fully decked out as well. Gigabyte’s main tweaking utility, EasyTune 6, was very easy to use and has adjustments to practically every system setting including the CPU, memory, and graphics. The clean interface, simple to adjust levels, and easy to read numbers kept this software pain-free. Included with EasyTune 6 is also the Auto Tuner feature, which is Gigabyte’s auto overclocking utility. Although this function may be useful for those completely uninterested in doing any sort of manual overclocking, it was far from desirable. Instead of simply increasing the turbo boost multiplier, Auto Tune requires automatically increases the base clock as well, which isn’t recommended for Sandy Bridge/Ivy Bridge based systems. Additionally, the one click over clocking utility also overcompensated for voltage, which created unnecessary heat.
Manual overclocking on the other hand was a breeze and using Gigabyte’s excellent 3D PWM power regulation, we were able to very easily push our Ivy Bridge i5 3570K to 4.8GHz at 1.35v. (1.332V with a little Vdroop) Although the processor ran at around the 90°C mark under load, it was rock solid through our stress testing. It was actually quite easy to reach such an overclock, so I wouldn’t be surprised if higher overclocks could be reached with more advanced cooling.
The Gigabyte Z77X-UD3H is currently priced at around $159.99 on Amazon. Some of its competitors include the MSI Z77A-GD55 ($160), MSI Z77A-GD65 ($180), and the ASUS P8Z77-V($185) so in terms of price and features, the Gigabyte Z77X-UD3H is priced quite competitively. The only thing I’d advise you to watch out for when picking up this board is the fact that it only has 6x onboard SATA ports. If for some reason you’re looking for a board with 8, you may want to opt for the Z77X-UD5H instead for about $30 more.
Bottom Line
Packing a solid set of features the Gigabyte Z77X-UD3H is truly a fantastic motherboard for anyone looking to build a mid to high end Ivy Bridge system.
Special thanks to Gigabyte for making this review possible.
The Gigabyte Z77X-UD3H is currently available at Amazon.

