Build a Powerful Next Generation Gaming PC!
With the recent release of Intel’s latest 4th Generation Intel Core Processors codenamed Haswell, a number of our readers here have been contacting us for an update to the $1,500 gaming PC build and since our last $1,500 gaming PC build was a small form factor gaming PC build, we decided to go ahead and see what we could come up with. For our build today, the goal was to create a no compromise system that would run every game on the market at high to ultra settings at 1080p yet still keep the budget under $1,500.
Care to check out what we’ve come up with? Let’s find out!
Haswell Gaming Computer Build Component Summary – Budget: $1,500
| CPU | Intel Core i5-4670K | $241 |
|---|---|---|
| Motherboard | Gigabyte Z87X-UD3H | $170 |
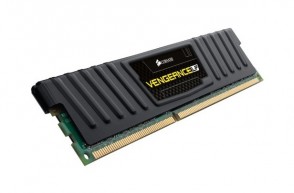
| Memory | 8GB (2x4GB) Corsair Vengeance 1600MHz DDR3 Low Profile | $70 |
| GPU | EVGA GeForce GTX 770 SuperClocked | $420 |
| Case | Corsair Carbide Series 300R Windowed | $90 |
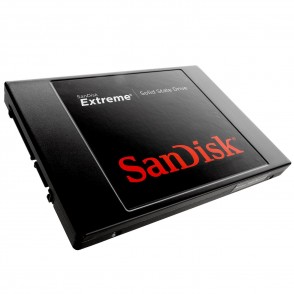
| SSD | SanDisk Extreme 240GB SSD | $173 |
| Optical Drive | OEM DVD Drive or OEM Blu Ray Drive | $22 |
| PSU | Corsair TX650M | $105 |
| CPU Cooler | Cooler Master Hyper 212 Evo | $33 |
| OS | Windows 7 Home Premium 64 Bit | $91 |
| Total | $1415 |
Core Component Details
CPU – Intel Core i5-4670K
 For this month’s gaming PC build, we’ll be using the newly released Intel Core i5-4670K processor (4th Generation Intel Core Processor) that was recently introduced at the beginning of this month. The Core i5-4670K, based off the Haswell architecture, replaces the last generation Ivy Bridge based Core i5-3570K, which was among the top processors for gaming from both a value and performance standpoint. With the Core i5-4670K, this story hasn’t changed.
Despite Intel focusing on power efficiency with the new Haswell processors, the new Core i5-4670K is once again a performer, sporting the same 3.4 GHz clock speed with the ability to turbo up to 3.8GHz as the last generation Core i5-3570K. That said, despite the Core i5-4670K receiving identical clock speeds as its last generation counterpart, it’s still able to pull of up to a 10-20% performance improvement depending on the workload.
In addition, we’ve also selected a K series processor, which has a factory unlocked multiplier to allow for easy overclocking as well. Since Haswell’s overclocking ability is relatively similar to what we saw in last generation Ivy Bridge parts, a mild overclock of up to 4.0-4.6 GHz (~15-25%+ performance improvement) is easily achievable with proper cooling.
Motherboard – Gigabyte Z87X-UD3H
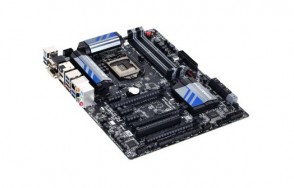 Ever since the Z77 era, Gigabyte’s motherboards have been one of my favorites given the amount of features they’re able to cram in for the asking price, and with the release of the Z87 based counterparts, Gigabyte has once again delivered an absolutely stellar product for the price.
For our gaming PC build this month, we’ll be going with the Gigabyte Z87X-UD3H, one of Gigabyte’s latest motherboards sporting Intel’s latest 8 series chipset. While an 8 series chipset is mandatory for Haswell processor support, it does bring on some marginal improvements such as support for six native SATA 6Gb/s ports along with six native USB 3.0 ports, effectively standardizing the faster SATA 6Gb/s and USB 3.0 interfaces, which should’ve been done with the last generation 7 series chipset.
Of course, the new 8 series chipset isn’t the only thing Gigabyte is bringing to the table with the Z87X-UD3H. The new motherboard also features a completely revamped UEFI interface, which is much more intuitive and responsive when compared to last generation offerings. The new board also features Gigabyte’s Ultra Durable initiative, now in the 5th generation, which consists of a number of a features such as a fully digital IR power delivery system, 10K solid black capacitors, 2x copper PCB design, glass fabric PCB, and more. We also have full support for PCIe 3.0, multi GPU support, and a whopping 32GB of DDR3 memory. As for connectivity, we’ll get a whopping eight SATA 6Gb/s ports and ten USB 3.0 ports thanks to the new 8 series chipset.
Oh, and did I mention the board looks really damn good too? There really is nothing like a solid black PCB with chromed out heatsinks.
Memory – 8GB (2x4GB) Corsair Vengeance 1600MHz DDR3 Low Profile
With Haswell also came improvements in the integrated memory controller allowing for better support of memory at higher frequencies, but like what we saw from Sandy Bridge and Ivy Bridge, higher clocked memory doesn’t necessarily translate into noticeable real world results, which is why we’re once again going with our usual 8GB (2x4GB) Corsair Vengeance 1600MHz Low Profile memory.
While those with big budgets (and big overclocking ambitions) may go with a memory kit such as the Dominator Platinum 2666MHz kit, those more down to earth will find that the Vengeance Low Profile 1600MHz kit will be more than enough for your gaming needs.
For those also looking to do some video recording and editing on the side, be sure to pick up 16GB of memory in a 2x8GB configuration such as the Corsair Vengeance 16GB (2x8GB) DDR3 1600Mhz to leave additional room for expansion should it be necessary down the line.
Case – Corsair Carbide Series 300R Windowed
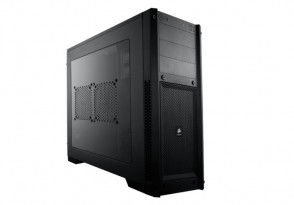 While I’d much rather prefer something like the new NZXT Phantom 630, the Corsair Carbide Air 540, or the CM Storm Stryker for our gaming build this month, we unfortunately are limited with a budget of $1,500, so we’ll be going with the Corsair Carbide Series 300R Windowed instead.
Despite the Corsair Carbide Series 300R’s more budget price point at only $90, it still includes all the features we’ll need for this build. Taking a look at the outer appearance, the Corsair Carbide Series 300R has a quiet, more stealthy appearance which gives it a classy look and since we’re going with the windowed edition, we’ll also be able to show off all of the awesome hardware powering this gaming build.
As for features, the Carbide Series 300R features up to 7 fan mount locations, support for 240mm radiators up top, USB 3.0 front panel connectors, dust filters and more. Expansion options aren’t a problem either as it includes a total of 7 expansion slots with room for graphics cards up to 450mm long, three 5.25″ drive bays and four 3.5″/2.5″ drive bays. More than necessary for our gaming build today.
GPU – EVGA GeForce GTX 770 SuperClocked
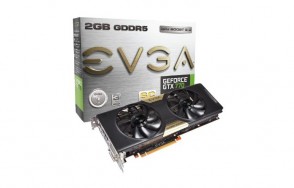 Our main goal today was to create a gaming system build that would run every game on the market at high to ultra settings at 1080p or higher, which is why today we’ll be going with the EVGA GeForce GTX 770 SuperClocked graphics card. As you can tell from its name, the EVGA GeForce GTX 770 SuperClocked is based off Nvidia’s latest 700 series graphics cards, which was released late last month.
Boasting a core clock of 1111MHz and a boost clock of 1163MHz, 2GB of GDDR5 memory clocked at 7 GHz (effective) running off a 256-bit interface, and a whopping 1536 CUDA cores, the GTX 770 SuperClocked is certainly a beast, but that’s not all. Since we’re going with the EVGA’s GTX 770 SuperClocked edition of the card, it also features EVGA’s custom ACX dual fan cooler design, which runs cooler and quieter than Nvidia’s reference design cooler. Since it’s been well documented from the Nvidia’s 600 series graphics cards that boost clocks are heavily dependent on GPU temperature, it’s important to have a powerful cooling solution.
Storage – SanDisk Extreme 240GB SSD
Since we have a bit of a budget at $1,500 for this month’s gaming build, we knew we wanted to have an SSD in the system. While SSDs don’t necessarily improve framerates in games, it does however reduce game install and load times as well as improve the “snappiness” of day to day tasks such as opening a browser or launching an application.
For today’s gaming build, we’ll be going with the SanDisk Extreme 240GB SSD, which is a slightly older SSD based off the SandForce SF-2281 controller paired with some of SanDisk’s finest 24nm toggle NAND. While the SanDisk Extreme isn’t the fastest SSD on the market, especially with the recent release of the SanDisk Extreme II SSD, it’s difficult to argue with the asking price of only $172.99, making it a mere $0.72/GB.
Despite the fact that the SanDisk Extreme is slightly older, it still rocks solid performance ratings at up to 550MH/s reads and 520 MB/s writes, which will completely dominate any traditional hard drive.
Those with extremely extensive game libraries or with larger media collections may also go with an additional internal hard drive such as the Seagate Barracuda 3TB, which will offer plenty of additional storage at a low cost. That said, games and applications running off the traditional hard drive will not receive the performance benefits of the SSD.
Final Pricing
Current pricing on Amazon for our build today is $1,415, which fits right under our $1,500 budget. Those with larger budgets may consider upgrading to a faster SSD such as the Samsung 840 Pro or a better case such as the NZXT Phantom 630. As usual, if you’re interested in upgrades or changes to the build, be sure to post in the comments for additional changes based off your needs.
Optional Components
Some readers have expressed interest in monitor, speaker, mice and keyboard suggestions, so we’ve also started including some recommendations for these items as well. I won’t be explaining the choices as these optional components are quite dependent on the purpose of PC (For example, someone serious about audio may end up with $400 Audioengine 5+ speakers and an ASUS Xonar Essence STX), but here are some suggestions that are a good fit for this build.
| Monitor | ASUS VS278Q-P 27″ Ultrafast 1ms Monitor | $295 |
|---|---|---|
| Sound Card | Creative Sound Blaster Z | $120 |
| Speakers | Audioengine A2 | $199 |
| Headphones | Razer Kraken Pro Gaming Headset | $80 |
| Mouse | Razer DeathAdder 2013 | $57 |
| Keyboard | Razer BlackWidow Ultimate Mechanical Gaming Keyboard | $133 |
Remember, if you have any questions, need some help, or need to fit the build into your budget feel free to visit the forums! Myself, or the community here will be more than happy to help you out with your own custom build or answer any computer questions you may have. If this build doesn’t fit your needs, be sure to drop by our Computer Builds section to find more computer builds.
Also, be sure to join us on Facebook, Twitter, Google Plus, or YouTube. Be updated on the latest news, reviews, tutorials, custom computer builds, and more!

![Best Haswell Gaming PC Build Under $1500 [June 2013]](https://www.custompcreview.com/wp-content/uploads/2013/06/corsair-carbide-300r.jpg)
![Best Budget Workstation PC Build Under $800 [July 2016]](https://www.custompcreview.com/wp-content/uploads/2016/07/corsair-carbide-series-100r-silent-product-image.jpg)
![Best High End Gaming Workstation PC Build Under $2,500 [August 2013]](https://www.custompcreview.com/wp-content/uploads/2012/05/corsair-graphite-600t-white.jpg)
![Best Custom Gaming Computer Build Under $1,200 [March 2012]](https://www.custompcreview.com/wp-content/uploads/2012/03/cooler-master-storm-scout.jpg)
![Best Photo/Video/3D Workstation Computer Build Under $1000 [August 2012]](https://www.custompcreview.com/wp-content/uploads/2012/06/antec-one-gaming-computer-case.jpg)
Lately I’ve received a number of e-mails regarding the SSD selection on this build. It seems like SanDisk has discontinued the Extreme to focus their efforts on the Extreme II. Our recommendation in this case is to go with the Samsung 840 EVO.
Here’s a link to our review for the Samsung 840 EVO.
https://www.custompcreview.com/reviews/samsung-840-evo-250gb-750gb-ssd-review/18338/
Here’s a link for purchase.
http://www.amazon.com/gp/product/B00E3W1726/ref=as_li_ss_tl?ie=UTF8&camp=1789&creative=390957&creativeASIN=B00E3W1726&linkCode=as2&tag=cupcre06-20